Advanced Color Theory
The Complete Guide to
Dark Lip Color Correction Lakeland
Naturally deep, cool, or uneven lip tone needs a different approach than a standard lip blush — one built around real color theory and patience, not a quick fix. At Jourdain Ink, dark lip color correction Lakeland clients trust is a gentle, multi-session process, done carefully in a private studio setting.

Anatomy & Color
Understanding Lip Undertones
Neutralizing Cool Tones
Before adding any pink or rose, I apply warm corrector pigments — oranges and rich corals — to counter purplish or dark undertones underneath.
Preserving Tissue Health
Lip tissue is delicate. I work with a light touch throughout to help prevent post-inflammatory hyperpigmentation during healing.
Lips that naturally carry deep violet, blue, or brown undertones can’t simply be tattooed over with pink or red pigment. Doing so usually makes things worse — the cool undertone mixes with a cool target color and heals into a muddy, darker result than what you started with.
I approach dark lip color correction Lakeland as a step-by-step process. Session one is entirely about warmth restoration — depositing compensating pigment to neutralize the cool darkness first. Once your lips heal into a balanced, warm base, we decide together whether to add a target shade or leave the natural warmth as-is.
“Correction is about building balance first. Neutralize the cool undertone, and everything after that heals brighter and truer.”
Step-By-Step Protocol
The Multi-Session Transformation
A soft, radiant result takes patience. This tissue reacts strongly to trauma, and pushing too much pigment or rushing the process in one sitting can trigger post-inflammatory hyperpigmentation — healing darker than where you started.
I break the journey into structured phases. Session one focuses entirely on warming cool, purplish, or brown tones with specialized corrector pigment. Over the following 8 to 12 weeks of healing, that warmth cancels out the cool undertone underneath, settling into a balanced baseline.
At your follow-up, I evaluate how your tissue responded. Once the cool tone is fully neutralized, we introduce your target shade — a soft nude, warm peach, or gentle rose. Every session follows clinical guidelines set by the Society of Permanent Cosmetic Professionals.
Neutralization Phases
- • Phase 1: Undertone Mapping & Warmth Deposit
- • Phase 2: 8–12 Week Healing
- • Phase 3: Secondary Neutralization (If Needed)
- • Phase 4: Target Color Application
- • Phase 5: Final Healed Result & Long-Term Care
Visual Transformations
Healed Results
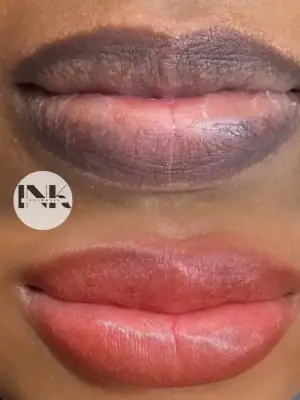
Phase 1: Warmth Neutralization
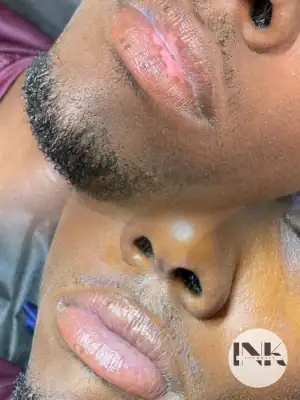
Healed Tone Balancing
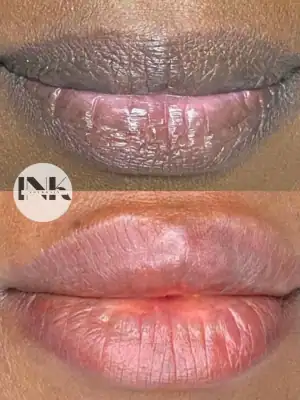
Final Target Shade
Safety & Preparation
Client Guidelines & Antiviral Care
Preparing for Your Session
Lip hydration matters a lot here. Dry, cracked, or flaking lips don’t absorb pigment evenly, which can lead to patchy results. Gently exfoliate and moisturize with lip balm daily for at least a week before your appointment.
If you’ve ever had a cold sore or fever blister, even once, please tell me before booking. The micro-trauma from this procedure can trigger an outbreak, which risks pigment loss or scarring during healing. I require anyone with cold sore history to consult their physician about a preventive antiviral (such as Valtrex or Acyclovir), taken 3 days before and 3 days after every session.
Preparation Checklist
- ✓ Hydration: Moisturize lips thoroughly for 7 days prior.
- ✓ Antiviral Protocol: Start prescription antivirals 3 days before, if applicable.
- ✓ Avoid Fillers: Complete lip filler at least 4 weeks before session.
- ✓ No Blood Thinners: Avoid alcohol, caffeine, and aspirin for 24 hours.
- ✓ Sun Protection: Avoid active sunburns or tanning beforehand.
Visual Process Roadmap
The Neutralization Timeline

How I map, warm, and neutralize dark lip undertones across structured sessions.